How to configure sendmail as a SMART HOST

Sometimes I need to test the email functionality of a PHP website on my local machine. The best and easiest way I found so far is using sendmail as a smart host.

A smart host is a piece of software that routes email to an intermediate mail server rather than directly to the recipient’s server. The only thing you need is the SMTP address of your internet service provider. For example, my ISP is Virgin Media and their SMTP server is smtp.virgin.net.

First of all you have to install sendmail. On Ubuntu:

sudo apt-get install sendmail

Then open your configuration file:

sudo vi /etc/mail/sendmail.mc

and append or modify the following line to define your ISP SMTP server:

define(`SMART_HOST',`smtp.virgin.net')

Remove the “dnl” word at the end if there is one. Now login as root and regenerate the sendmail config file:

m4 /etc/mail/sendmail.mc > /etc/mail/sendmail.cf

and restart sendmail:

service sendmail restart

Now your local machine should be able to send emails. The easiest way to test is from the PHP interactive shell:

php -a
mail('myemail@domain.com','TEST','WORKING?!?');

Enjoy… :-)

How to ssh to a server without password

If you connect to a remote server regularly, typing your password every time gets old fast. Key-based authentication is the standard way around this — it is more secure and more convenient once set up.

Generate a key pair

On your local machine, run:

ssh-keygen -t rsa

This creates a 2048-bit RSA key pair in ~/.ssh/. The public key is saved as id_rsa.pub, the private key as id_rsa. Keep the private key safe — anyone who has it can log into any server that trusts the matching public key.

Copy the public key to the server

Copy the public key to the remote server and append it to the authorized keys file:

scp ~/.ssh/id_rsa.pub my_username@mySshServer:~/.ssh/id_rsa_local.pub
cd ~/.ssh/
cat id_rsa_local.pub >> authorized_keys2

Make sure the permissions are correct on the server (~/.ssh should be 700, authorized_keys2 should be 600). If the permissions are too loose, SSH will ignore the key and fall back to password authentication.

Connect using sftp

You can also connect using SFTP with the same key pair:

sftp://my_username@mySshServer/home/my_username

Using ssh-agent to avoid typing your passphrase

If you set a passphrase on your key (recommended), you will be prompted for it the first time you use the key each session. You can avoid this by adding the key to ssh-agent:

eval $(ssh-agent)
ssh-add ~/.ssh/id_rsa

Enter your passphrase once, and ssh-agent will remember it for the rest of your session. On most desktop Linux distributions, ssh-agent starts automatically when you log in.

Troubleshooting

If SSH still asks for a password, check these in order:

  • Server file permissions: ~/.ssh must be 700, authorized_keys must be 600
  • You appended the correct public key (compare with cat ~/.ssh/id_rsa.pub on your local machine)
  • The server’s /etc/ssh/sshd_config has PubkeyAuthentication set to yes
  • Check /var/log/auth.log on the server for specific error messages

Once it works, you can SSH into the server without being prompted for a password.

Enjoy!

Sharing Internet connection trough an ethernet card with Ubuntu

If you have more than one network card (wireless and ethernet, like in a normal laptop) you can share your Internet connection with another computer via the ethernet cable. “When should I need such a thing?” you say. I know, I know… let me explain. :-)

The other day I was working on a Linux laptop that doesn’t have an integrated wireless card and the USB one had not been recognised after a fresh install. I needed to install a package to make it work but had no Internet. Classic Linux chicken-and-egg problem, isn’t it? :-)

Here is how you do it. Go to System > Preferences > Network Connections, click on the “Wired” tab and add or edit an existing connection. In the IPv4 Settings tab, change the “Method” to “Shared to other computers”.

Network connections in Ubuntu Lucid

Editing network connection in Ubuntu Lucid

If the graphical tool is not available, you can also set this up from the command line:

sudo ifconfig eth0 10.42.0.1 netmask 255.255.255.0 up
sudo iptables -t nat -A POSTROUTING -o wlan0 -j MASQUERADE
sudo sh -c "echo 1 > /proc/sys/net/ipv4/ip_forward"

This gives the connected machine an IP in the 10.42.0.x range and forwards traffic through your wireless interface.

Enjoy sharing!

Linux patch to boost Desktop performance

I have been using Linux (Ubuntu is my favourite distribution) for a few years now. I really like it, actually I love it. ;-) Sometimes though I notice that some software is not as fast as its Windows equivalent.

A common culprit was the kernel scheduler. The Linux kernel offers several I/O and CPU schedulers, each tuned for different workloads. The default in many distributions was the Completely Fair Scheduler (CFS) for CPU and CFQ for I/O — both excellent for servers but not always ideal for desktop interactivity.

The Con Kolivas “BFS” scheduler (Brain Fuck Scheduler) was a popular alternative for desktops. It was designed with a simpler algorithm that prioritised interactive responsiveness over throughput scaling. Many users reported a noticeably snappier desktop after switching.

You could test it without recompiling the kernel by passing boot parameters in GRUB. For the I/O scheduler, adding elevator=deadline or elevator=noop to the kernel command line could improve desktop responsiveness on certain hardware. The deadline scheduler, for example, tries to minimise latency for individual requests rather than maximising total throughput.

Your mileage will vary depending on your hardware and workload, but it was worth experimenting if you felt your desktop could be snappier.

Full article: Linux patch able to boost desktop performance.

Give it a try and see if it works for you! :-)

Open file graphically as administrator from Nautilus – Ubuntu

Working in the terminal is fine, but sometimes you’re browsing folders in Nautilus and you just want to right-click a config file and open it as root without typing commands. There used to be a package called nautilus-gksu for this, but it was deprecated years ago and removed from modern Ubuntu releases.

Here’s how to do it now.

Option 1: nautilus-admin (recommended)

The modern replacement is nautilus-admin, a Nautilus Python extension that adds “Open as Administrator” and “Edit as Administrator” to the right-click menu:

sudo apt install nautilus-admin

After installing, restart Nautilus:

nautilus -q

Now right-click any file or folder and you’ll see “Open as Administrator” in the menu. It’ll prompt for your password via pkexec and open a Nautilus window with root privileges.

Option 2: Use the admin:// URI

If you prefer not to install anything, you can type this directly into Nautilus’s location bar:

admin:///path/to/folder

Nautilus will prompt for your password and show the specified folder with root access. It’s not integrated into the right-click menu, but it works without any extra packages.

Enjoy!

How to install Miro 3.5 on Ubuntu 10.04

Miro 3.5 has been released. The major improvement, in my opinion, is the ability to convert video and audio files for other devices — Android OS for example.

Ubuntu 10.04 is bundled with Miro 3.0. To upgrade, add the repository:

sudo add-apt-repository ppa:pcf/miro-releases
sudo apt-get update
sudo apt-get install miro

Miro 3.5 screenshot

Enjoy the file conversion! :-)

How to install the latest version of Shotwell under Ubuntu Lucid (10.04)

From Ubuntu 10.10 (Maverick Meerkat), Shotwell is the new default photo manager. I tried it under Ubuntu 10.04 (Lucid Lynx) but the latest version was not available in the standard repositories.

To install the latest version on Lucid, add the Shotwell PPA:

sudo add-apt-repository ppa:shotwell/ppa
sudo apt-get update
sudo apt-get install shotwell

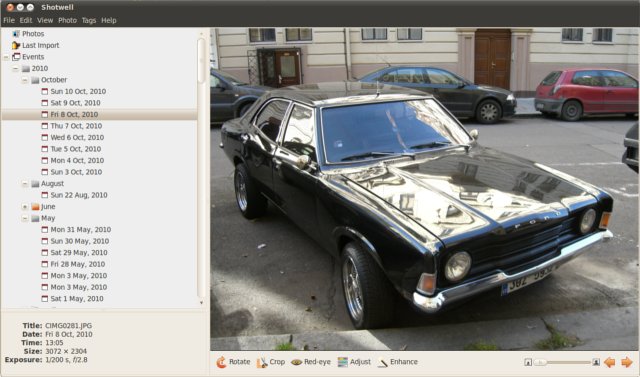
Shotwell screenshot

Give it a try and see if it suits your needs!

Web Developer Tools app Review

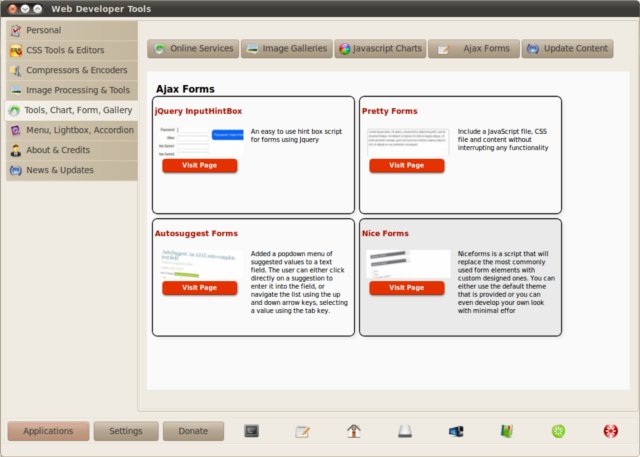
WDT (Web Developer Tools) is a suite of many different tools for web developers. Not all of them are useful to me but they might be to you… ;-)

It includes an HTTP header viewer, an HTML/CSS inspector, a JavaScript console, a cookie manager, and more. All packed into a single app.

Web Developer Tools screenshot

For instance, I find it useful how quickly you can inspect the HTTP headers of a page to debug redirects or caching issues. It is the kind of tool that saves you from opening Firebug or Chrome DevTools for quick checks.

Give it a try if you do any web development! :-)